Ssh Jar File For Iphone 4s
Install and Use SSH

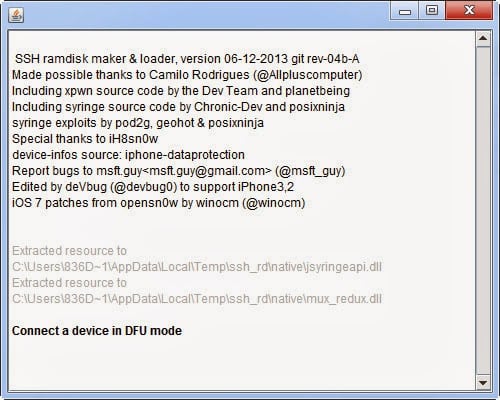
IPhone 4S, iOS 5.0.1 Posted on Feb 21, 2012 4:26 AM Reply I have this question too ( 6 ) I have this question too Me too (6) Me too. IPhone 4 iCloud Activation Bypass ( Windows Only) Works only for iPhone 4!!! Soon for iPhone 4s/5/5c/5s!! Instructions: 1. Put device into DFU mode 2. Run ssh.jar wait until it says successful 3. Open a new connection 5. Host name: 127.0.0.1 6. Password: alpine 9. Sshrdrev04b-iPhone4-RevA.jar download at 2shared. Click on program sshrdrev04b-iPhone4-RevA.jar to start downloading. 2shared - Online file upload - unlimited free web space. File sharing network. File upload progressor. 498832 programs available. According to Wikipedia, OpenSSH (OpenBSD Secure Shell) is a set of program which enable encrypted communication between two or more devices over a network using the SSH Protocol. In user terms, OpenSSH is hidden system that allows you to connect to your iPhone, iPod touch or iPad over the Wi-Fi network and transfer files between your computer. This file sshrdrev04b-iPhone4-RevA.jar is hosted at free file sharing service 4shared. If you are the copyright owner for this file, please Report Abuse to 4shared.
Author: BigBossSSH is one of the handiest tools ever ported for the iPhone. With SSH you can manage your phone, its files, and correct all sorts of problems. In short, everyone should have SSH installed and running on they’re iphone. This guide explains how to install and some basic usage for SSH.
Open SSH can be installed via installer or Cydia. SSH is a launch daemon. This means you will not get any sort of configuration icon. To configure SSH, I recommend installing SBSettings. To install Open SSH and SBSettigns:

- Open Cydia. On the search tab, type in “Open SSH” and install Open SSH.
- Search for SBSettings, install SBSettings and restart springboard when prompted.
Neither SBSettings nor OpenSSH will put an icon on your desktop. To launch SBSettings just swipe the top task bar. One of the toggles within SBSettings allows you to toggle SSH on and off. We will use this to turn off SSH when not in use. We will also use SBSettings to obtain the phone’s IP address.

Now that SSH is installed, it’s time to try to connect to it. But before we do this, you may need some additional software. If you’re on a MAC, you will just run terminal. However, if you’re on a PC, you need to download two packages, WinSCP and putty. Neither of these programs require any sort of installation. They will just run from the downloaded executable file. Now to connect to the session:
On OSX:
- Make sure phone is connected via wifi.
- Open Terminal
- Type ssh root@iphoneipaddress (substitute the iphone’s IP address for iphoneipaddress. Get this by opening SBSettings and looking at the “wifi” field. It is a number with 3 periods such as 10.2.2.24).
- The password is “alpine” (without the quotes). (Note: on older systems before 1.1.1, the password is “dottie”.
- It may take about 30 seconds on waiting for connect on the first time connecting.
- Once you are in, you are at a Unix command prompt.
On Windows (using putty):
- Open putty.exe
- In “Host Name (or IP address) box, type in the phone’s IP address. (Get this by opening SBSettings and looking at the “wifi” field. It is a number with 3 periods such as 10.2.2.24).
- Make sure connection type is “SSH”.
- Click “Open”.
- It may take about 30 seconds on “waiting for connect” on the first time connecting.
- The username is “root” and the password is “alpine” (without the quotes). (Note, on older systems before 1.1.1, the password is “dottie”.
- After this you mayget some warning about security key. Accept it to move forward.
- Once you are in, you are at a Unix command prompt.
On Windows (using WinSCP). WinSCP is more for file copying than issuing commands although you can also issue commands. WinSCP may be good for copying ROMs onto the phone or managing the file system.
- Open WinSCP.exe
- In “Host name” box, type in the phone’s IP address. (Get this by opening BossPrefs and looking at the “wifi” field. It is a number with 3 periods such as 10.2.2.24).
- In “User name” type “root”
- In “Password” type “alpine”
- Make sure “File Protocol” type is “SCP”.
- Click “Login”.
- It may take about 30-60 seconds on “waiting for connect” on the first time connecting.
- After this you mayget some warning about security key. Accept it to move forward.
- Once you are in, you will see a file browse box that looks something like the picture below.
The left side shows your local files and the right side shows your files on the phone. The yellow items are folders and the white items are files. Let’s say you wanted to add some ROMs to the path: /var/mobile/Media/ROMs/GBA. Let’s also say that hte ROMs folder does not yet exist. Here are the steps to navigate the right side on the phone to that folder:
- Double click the “..” until you are at the / folder. In the example above, this would be 3 times. You are starting in /private/var/root. The first double click of “..” puts you in /private/var. The next double click puts you in “/private”, and the next double click puts you in /.
- Double click “var”
- Double click “mobile”
- Double click “Media”
- Right click in the right pane on some free section and select “New, then Directory” (or just press F7). Give the directory the name “ROMs” (capitals count exactly as shown). If ROMs already exists, skip this step.
- Now double click “ROMs”
- Right click again and select “New, then directory”. This time name it “GBA”.
- Doubleclick “GBA”.
- Now on the left side, navigate to where you have stored your ROMs on your PC
- Drag the files you want from the left side (your pc) to the right side (your phone).
- When the copying has completed, you have now got ROMs on your phone.
- To delete the ROMs, follow all the same steps but instead of dragging the files over, just delete them on the right side (highlight and tap the delete key).
You should use putty when you need to type commands in and winscp when you need to manage files.
This tutorial is majorly about how to backup SHSH blobs and upload the local SHSH blobs.SHSH is the key to restoring, downgrading and upgrading iOS devices. The iPhone 4 with SHSH file backups can be downgraded to any compatible iOS version using 3uTools.

Please note the benefits of backuping SHSH via 3uTools:
a.) 3uTools can store the SHSH on its cloud server so that you can get it back easily later.
b.) As to the iOS firmware versions below iOS7.0, it’s not required to care about Apple’s closing the firmware signing; you can still “backup SHSH from device” even though the Apple has stopped the firmware signing.
1. An introduction to SHSH
What is SHSH?
SHSH is short for Signature HaSH blobs. SHSH is a certificate which can be used to verify the legitimacy of restoring iOS firmware via iTunes. During the processes of upgrading and restoring the iOS firmware versions, iTunes sends the device’s ECID to the Apple’s authentication server, and applies for the SHSH upgrading/restoring this firmware version; and then the Apple will send a SHSH file in relation to the ECID to iTunes via Apple’s authentication server, so that the iTunes can continue the particular iOS firmware upgrading/restoring successfully. Let’s cite an example: SHSH is a coded key, and you need the particular SHSH file to get the access of flashing the firmware version.
What can we do with SHSH?
In general the Apple will stop the signing of older firmware after a certain period as the latest one is released. For example, the Apple released iOS 7, and then stopped the signing of iOS 6.1.3. 'Signing closed' means that Apple will not allow the particular iOS restoring. But you can upgrade or downgrade your iPhone 4 to any compatible iOS version using 3uTools if your iPhone 4 has SHSH backups.
Why I need to backup SHSH?
If you want to restore your iOS device to a particular firmware version and its signing has been stopped by Apple, you need the SHSH blobs to pass the Apple’s authentication server.
2. How to backup SHSH files?
Step 1. Install the latest 3uTools, and connect your iPhone to the computer via the USB cable. Start the 3uTools.
Step2. Tap Flash Jailbreak→Advanced→backup SHSH from apple. Keep the device in DFU mode according to the reminders of 3uTools.
Step 3. The software can help backup the SHSH file to the cloud server of 3uTools automatically. (local path C: :/Program Files (x86)/3utools/download/shsh_file)
Note: As to the 'Query SHSH' feature, 3uTools can automatically backup your SHSH in the process of querying SHSH. If the firmware version is below iOS7 and its signing has been stopped by the Apple, you can directly use “backup SHSH from the device”.
3. How to upload SHSH?
Ssh Jar File For Iphone 4s 11
Ssh Iphone Windows
Step 1. Install the latest 3uTools, and connect your iPhone to the computer via the USB cable. Start the 3uTools.
Step 2. Click Flash jailbreak→Advanced→upload SHSH
Step 3. Choose the SHSH file you want to upload, and then click open.
Step 4. At this moment you have finished the SHSH upload, and then it could be stored on 3uTools permanently.
Ssh Jar File For Iphone 4s 5c
However, 3uTools may probably support downgrading more iOS devices with SHSH backups in the future.
Iphone Ssh App
Related Articles